# Quản lý thiết bị từ App

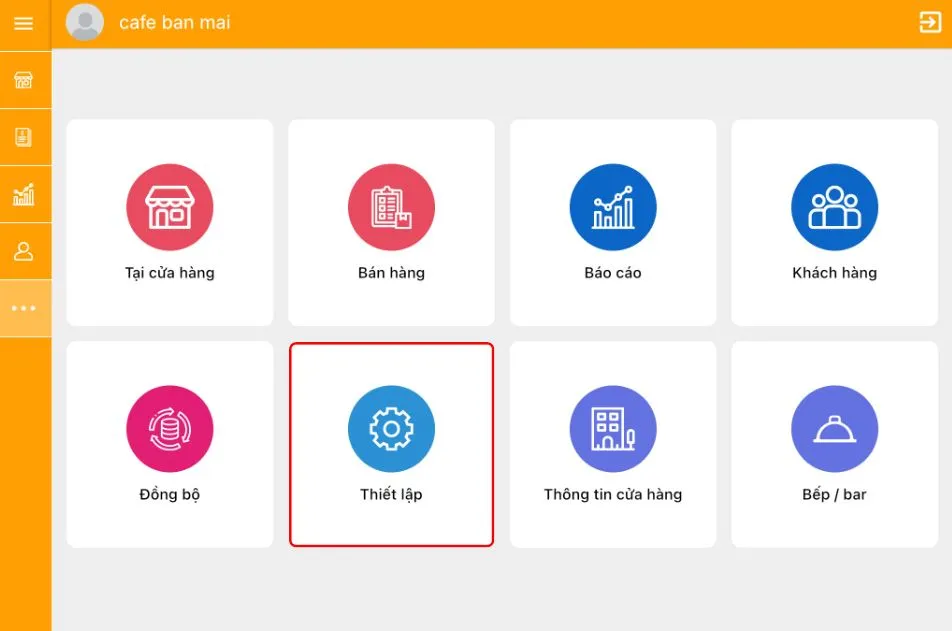
Bước 1: Trên Ứng dụng phần mềm quản lý PosApp, chọn mục Thiết lập
<figure><img src="https://lh6.googleusercontent.com/V4tLUsByhvcH68lvnn2_hYXRQgx6tdjWAlJSbWm1C43ATiGUdaPv6olGpzNdQpOBGsLnrrl00Ij82OVSzxY0KJGQGeU4ewXAOGNEhp647aOni5CzAQwlKWsu8yehLSI8RHD5m3bDkBs0zSNEzNKH2co" alt=""><figcaption></figcaption></figure>

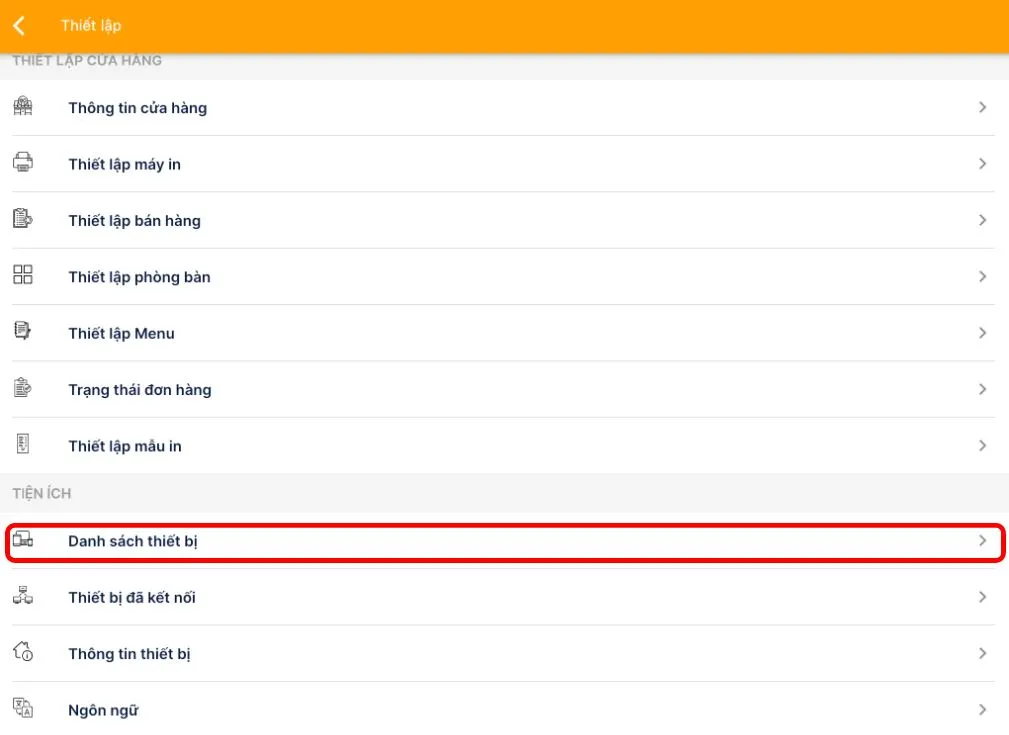
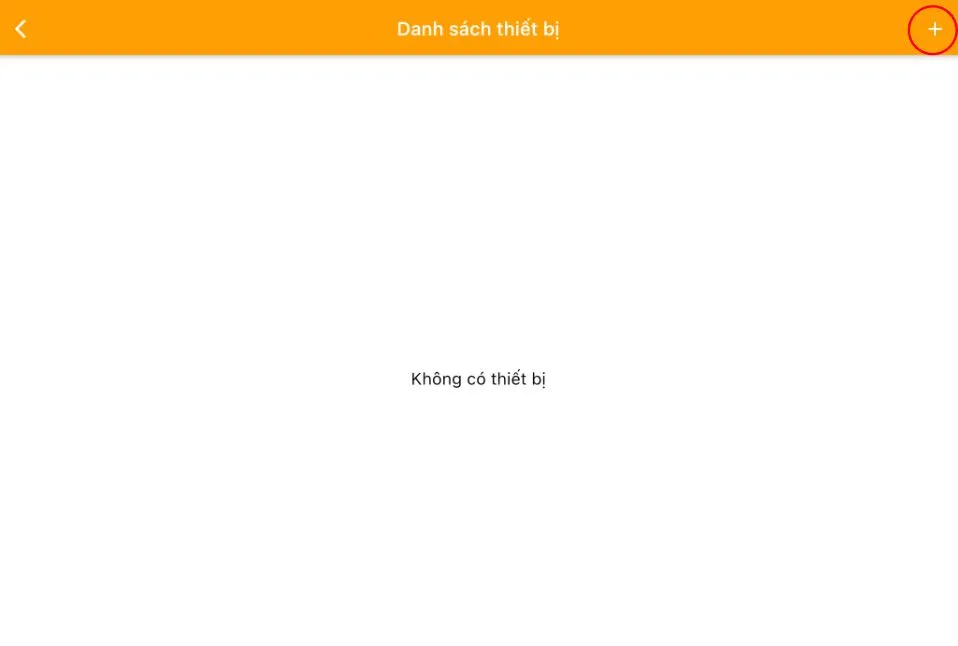
Bước 2: Chọn Danh sách thiết bị

<figure><img src="https://lh4.googleusercontent.com/SXh7LLVPoXM3M8mkqNdrBt6W88it9eZboWpUVU-5nGESzlCasMCUxOUteEhAEC16GubiBZg0chHbb11LiE_k7TILyO1E2p2lHKb2k2eskZx7CZsEg5k2hV7YMHAAzrpVHlIejlw_wCOwjk_C6tYbSG4" alt=""><figcaption></figcaption></figure>

Bước 3: Màn hình sẽ hiển thị danh sách các thiết bị đang hoạt động của cửa hàng (Không bao gồm thiết bị hiện tại đang mở), Chọn biểu tượng + để thêm thiết bị
<figure><img src="https://lh6.googleusercontent.com/ifhW5cCYHW8uphf1yxuxjHM5QB1g9ySudSU2ClA2-F8tMco18wjr7uNivSOzZS4We_MYjWKlQdn02K8G3EbDPwJAPz9tS5BFHA53sL9_AHOc-nh0thENKvsDa70pAtjdULy041yek3yS-KwaVOP0-1k" alt=""><figcaption></figcaption></figure>

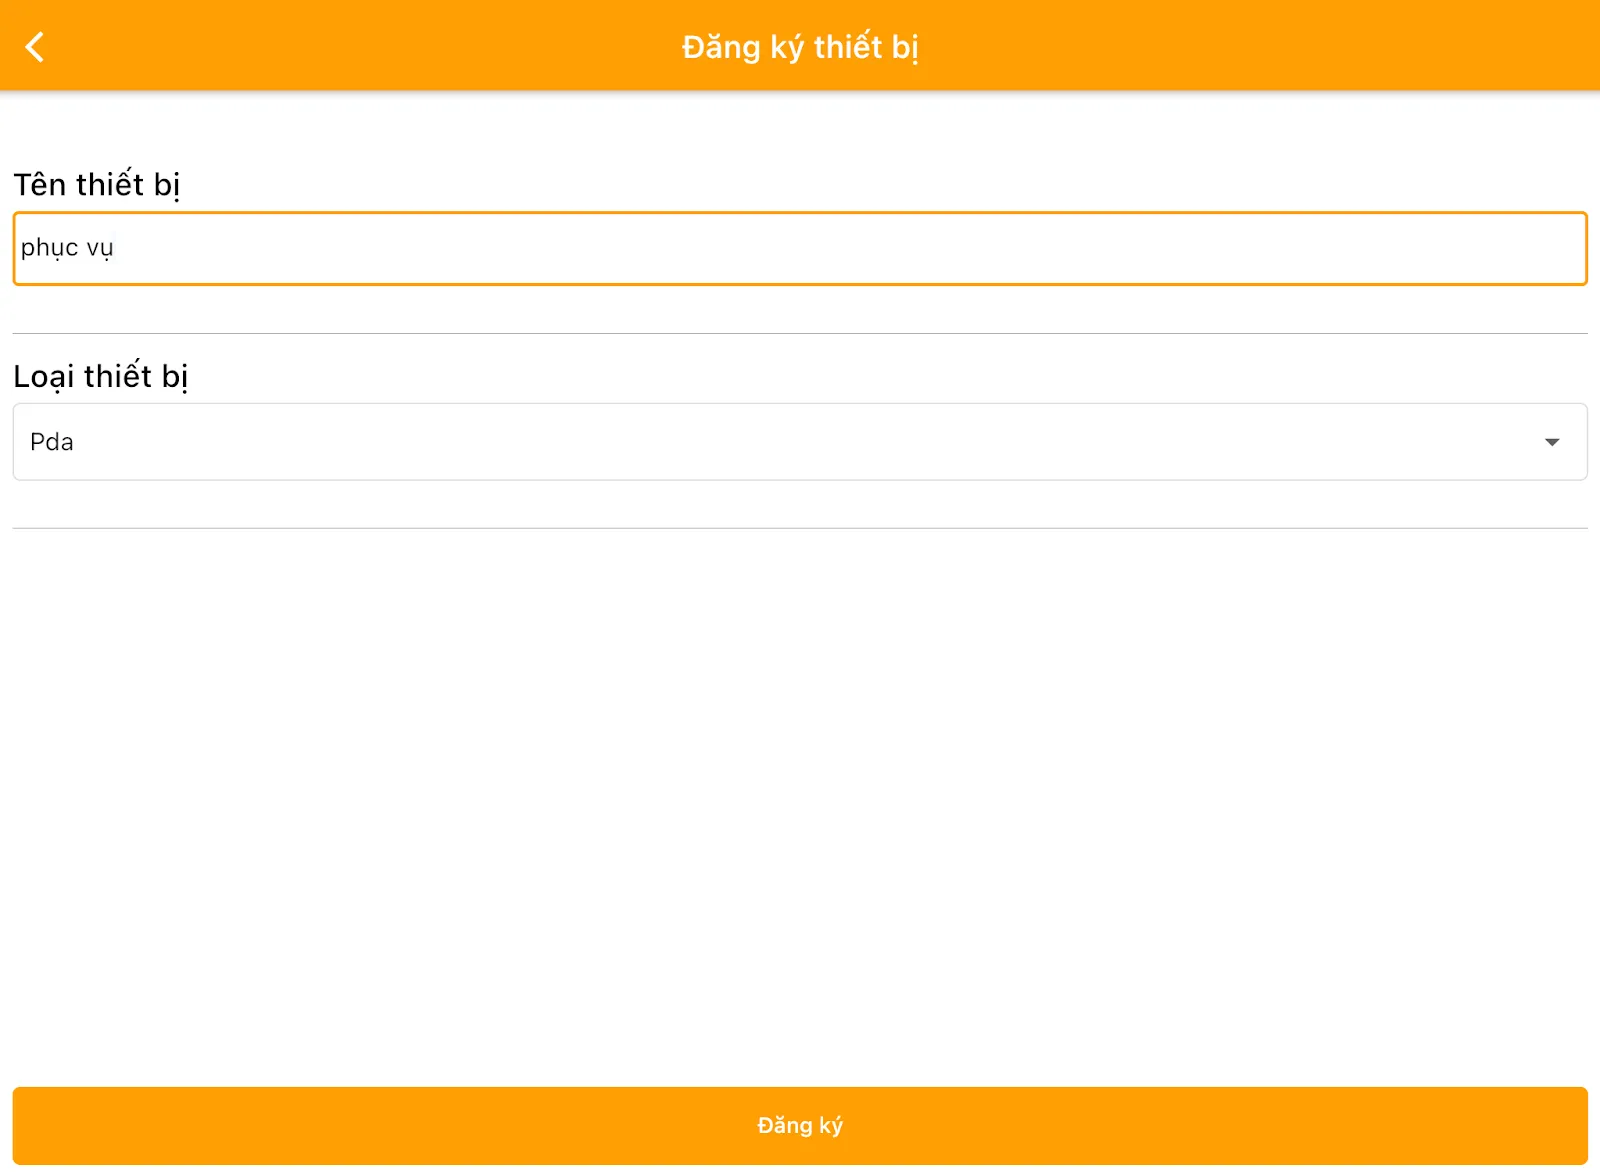
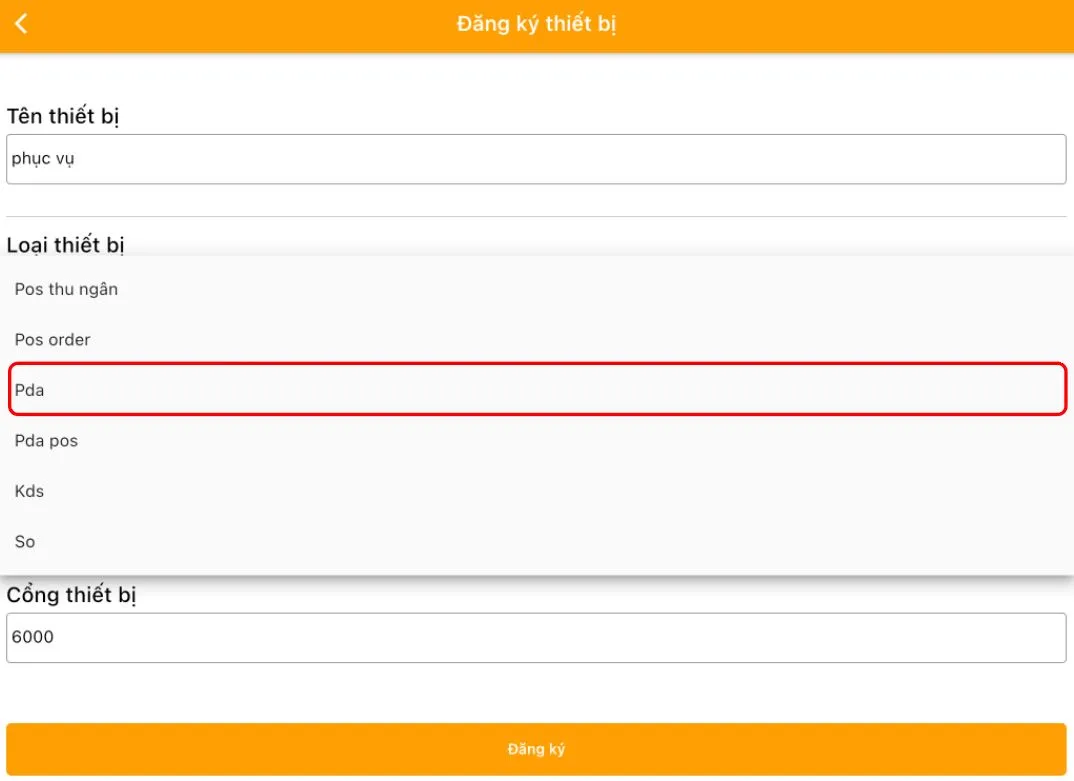
Bước 4: Điền các thông tin bắt buộc:

* Tên thiết bị
* Loại thiết bị: PDA (là các thiết bị nhân viên chỉ dùng để order như điện thoại Iphone, Android, máy tính bảng, IPAD  bắt buộc kết nối và gửi dữ liệu đến máy POS thu ngân để thanh toán.)
<figure><img src="https://lh4.googleusercontent.com/6Cl6Ku__S2a1bqq6szEuHCdzcXktiSNwWvFOOWTnBJ2CFbTK5yn94NvBMY7qJ0aBmf9qq6IKwJsgUhpQrBxOMbk4_ik_f8pNrn0qXV_PJiQv4IIg_N3n90uho3HKT_E4SKoQf44EF1kSnW_Zzfz0__Y" alt=""><figcaption></figcaption></figure>

Bước 5: Bấm Đăng ký

<figure><img src="https://lh3.googleusercontent.com/IDsJnLgZdnhcxL80gm6cUJGjhy01QA-OBS-vPdVAyYlgTVEBgO2Tz5LMI9BAYPm4zm0QNI0aSxLuwNvFP8HR8NUGdHZS5cpOGTcLXNijPMsN_qsd3GGHTXUvVcixLmIo8R6mCfzKXqFp0MhLgiyHCcU" alt=""><figcaption></figcaption></figure>

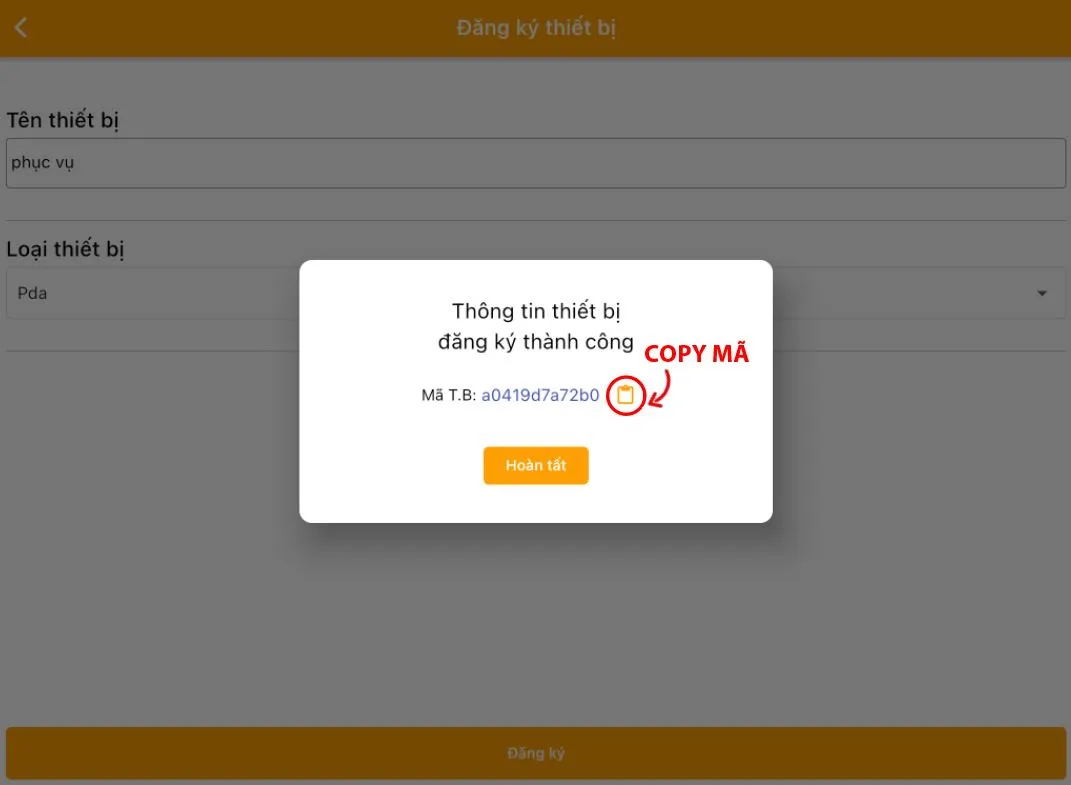
Mã của thiết bị vừa đăng ký sẽ hiển thị trên màn hình, Bạn có thể copy mã để gửi cho nhân viên:
<figure><img src="https://lh3.googleusercontent.com/JJNtgC3h3j_raCHLwojPFOJftZkVdbnD-bBzNES3jrHKqHy2QmwpeTcxKzGbbI1wc1xe5p5y1yTc05cCOBfq1Mod0laKJ5yiAi0q4BZokzxc-ELLXW4T-HQajaue3tBhzVx3zBszRA3Lt97O_OHzxHQ" alt=""><figcaption></figcaption></figure>

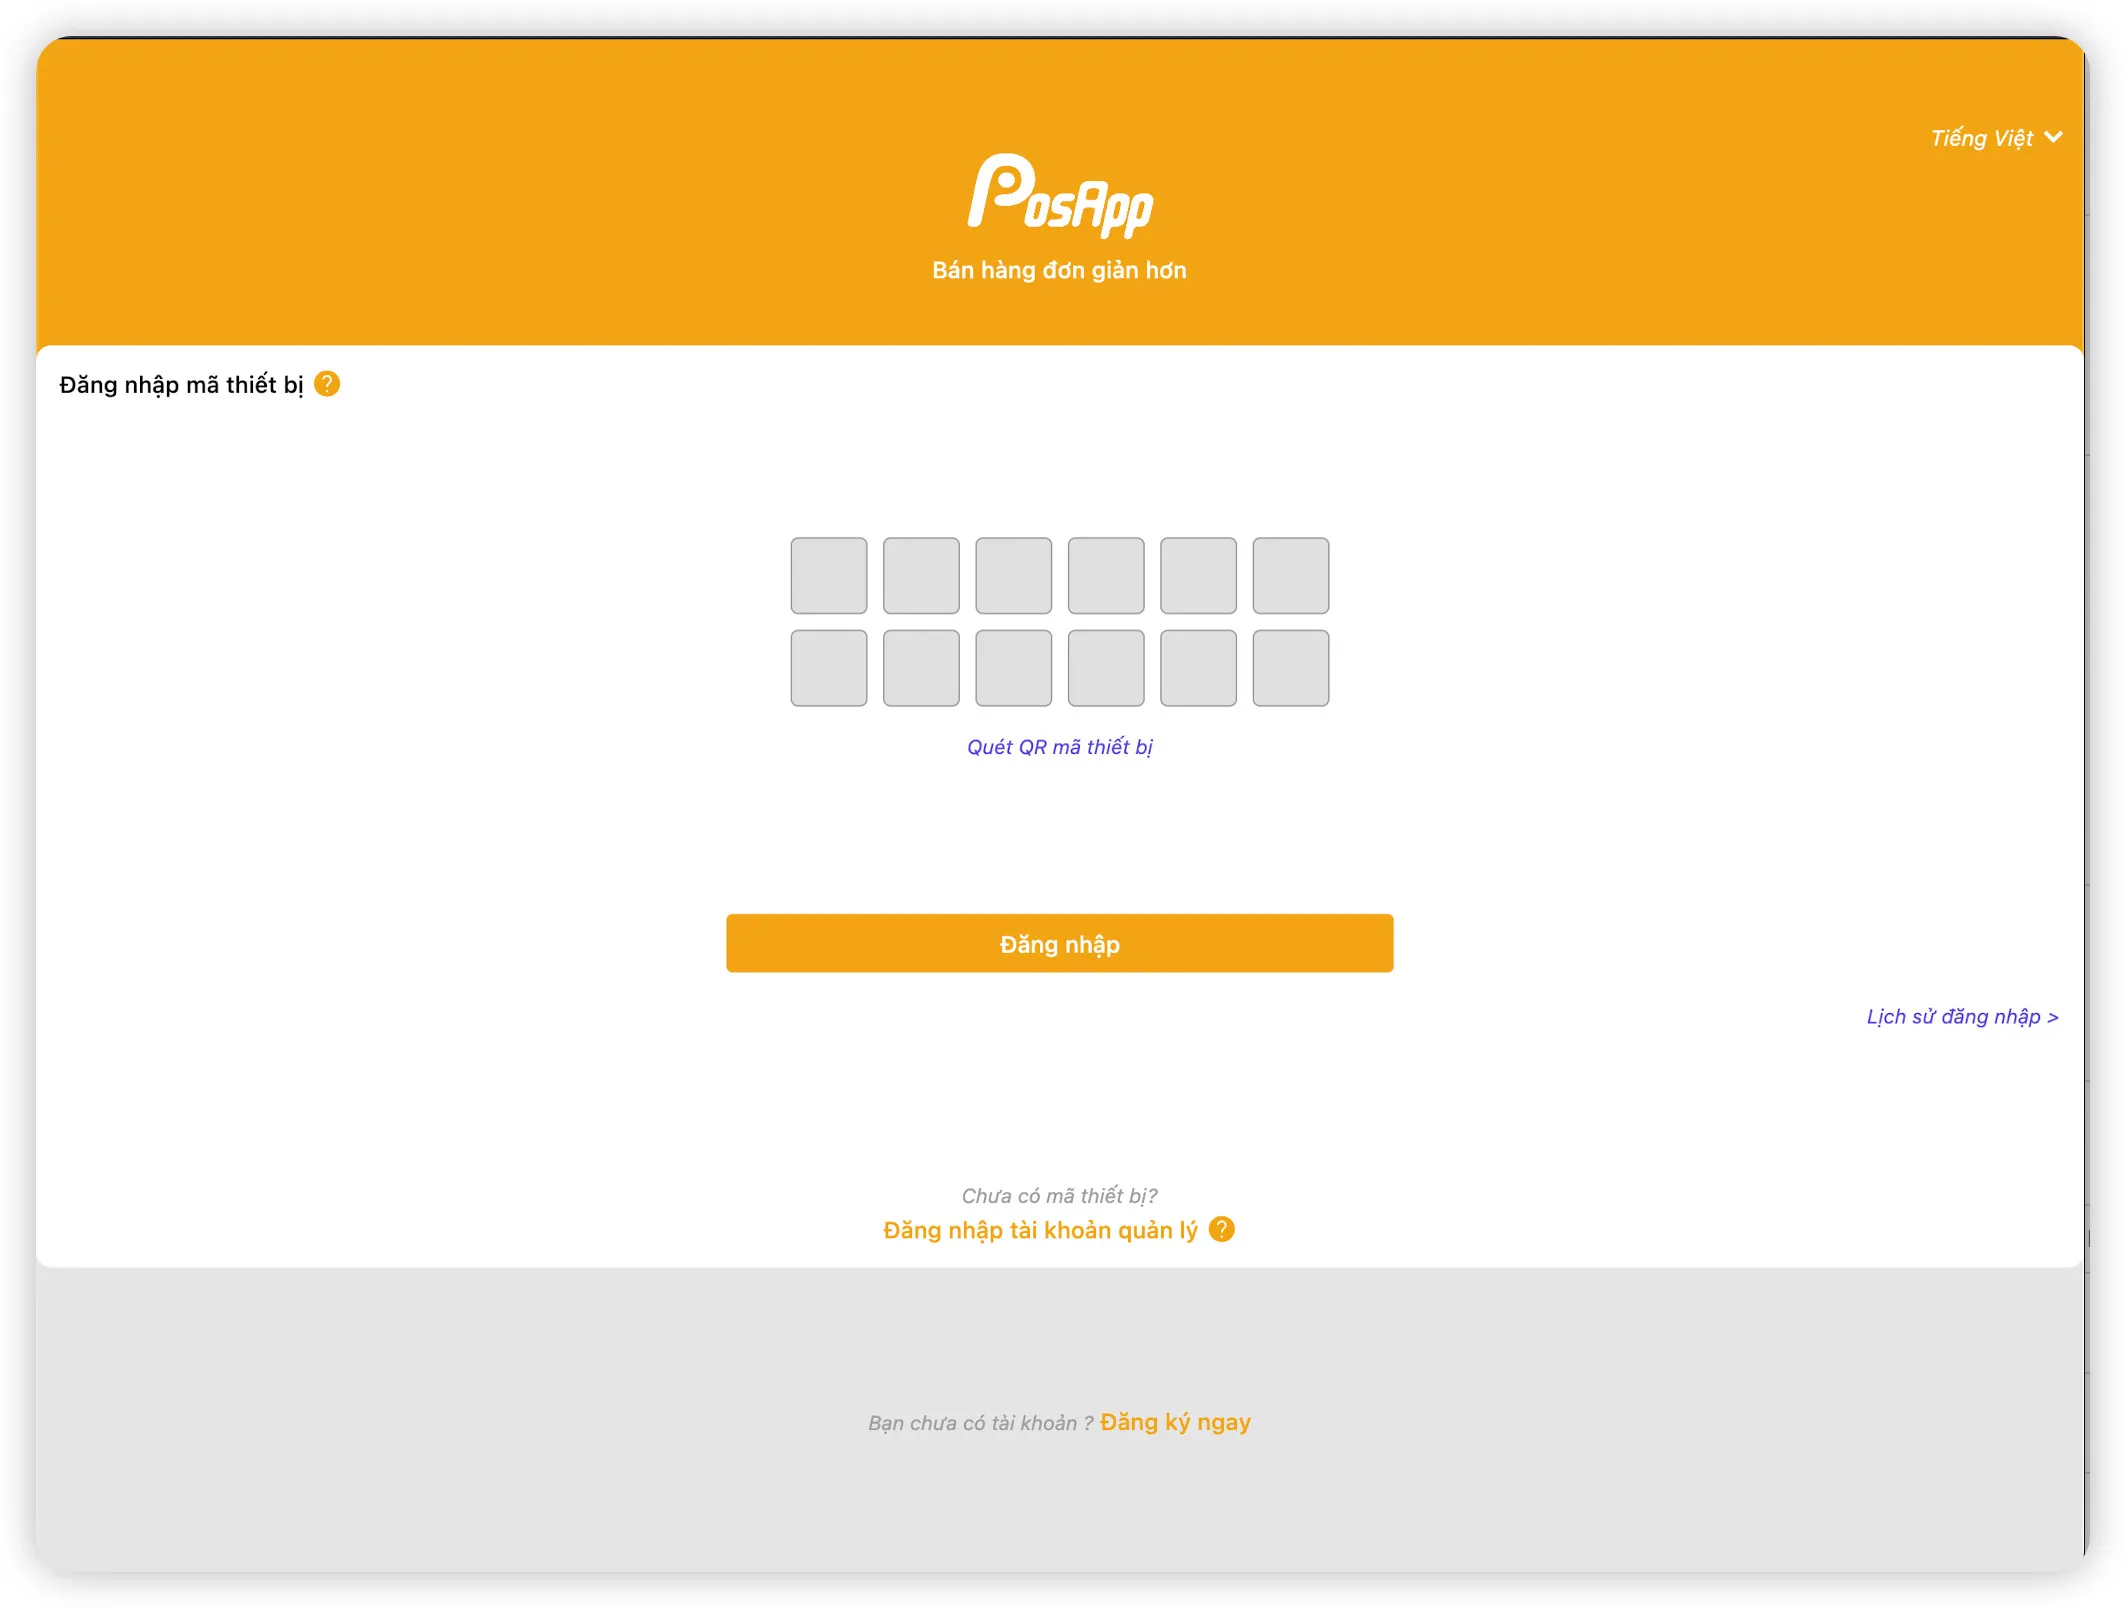
Bước 6: Nhân viên đăng nhập để bán hàng

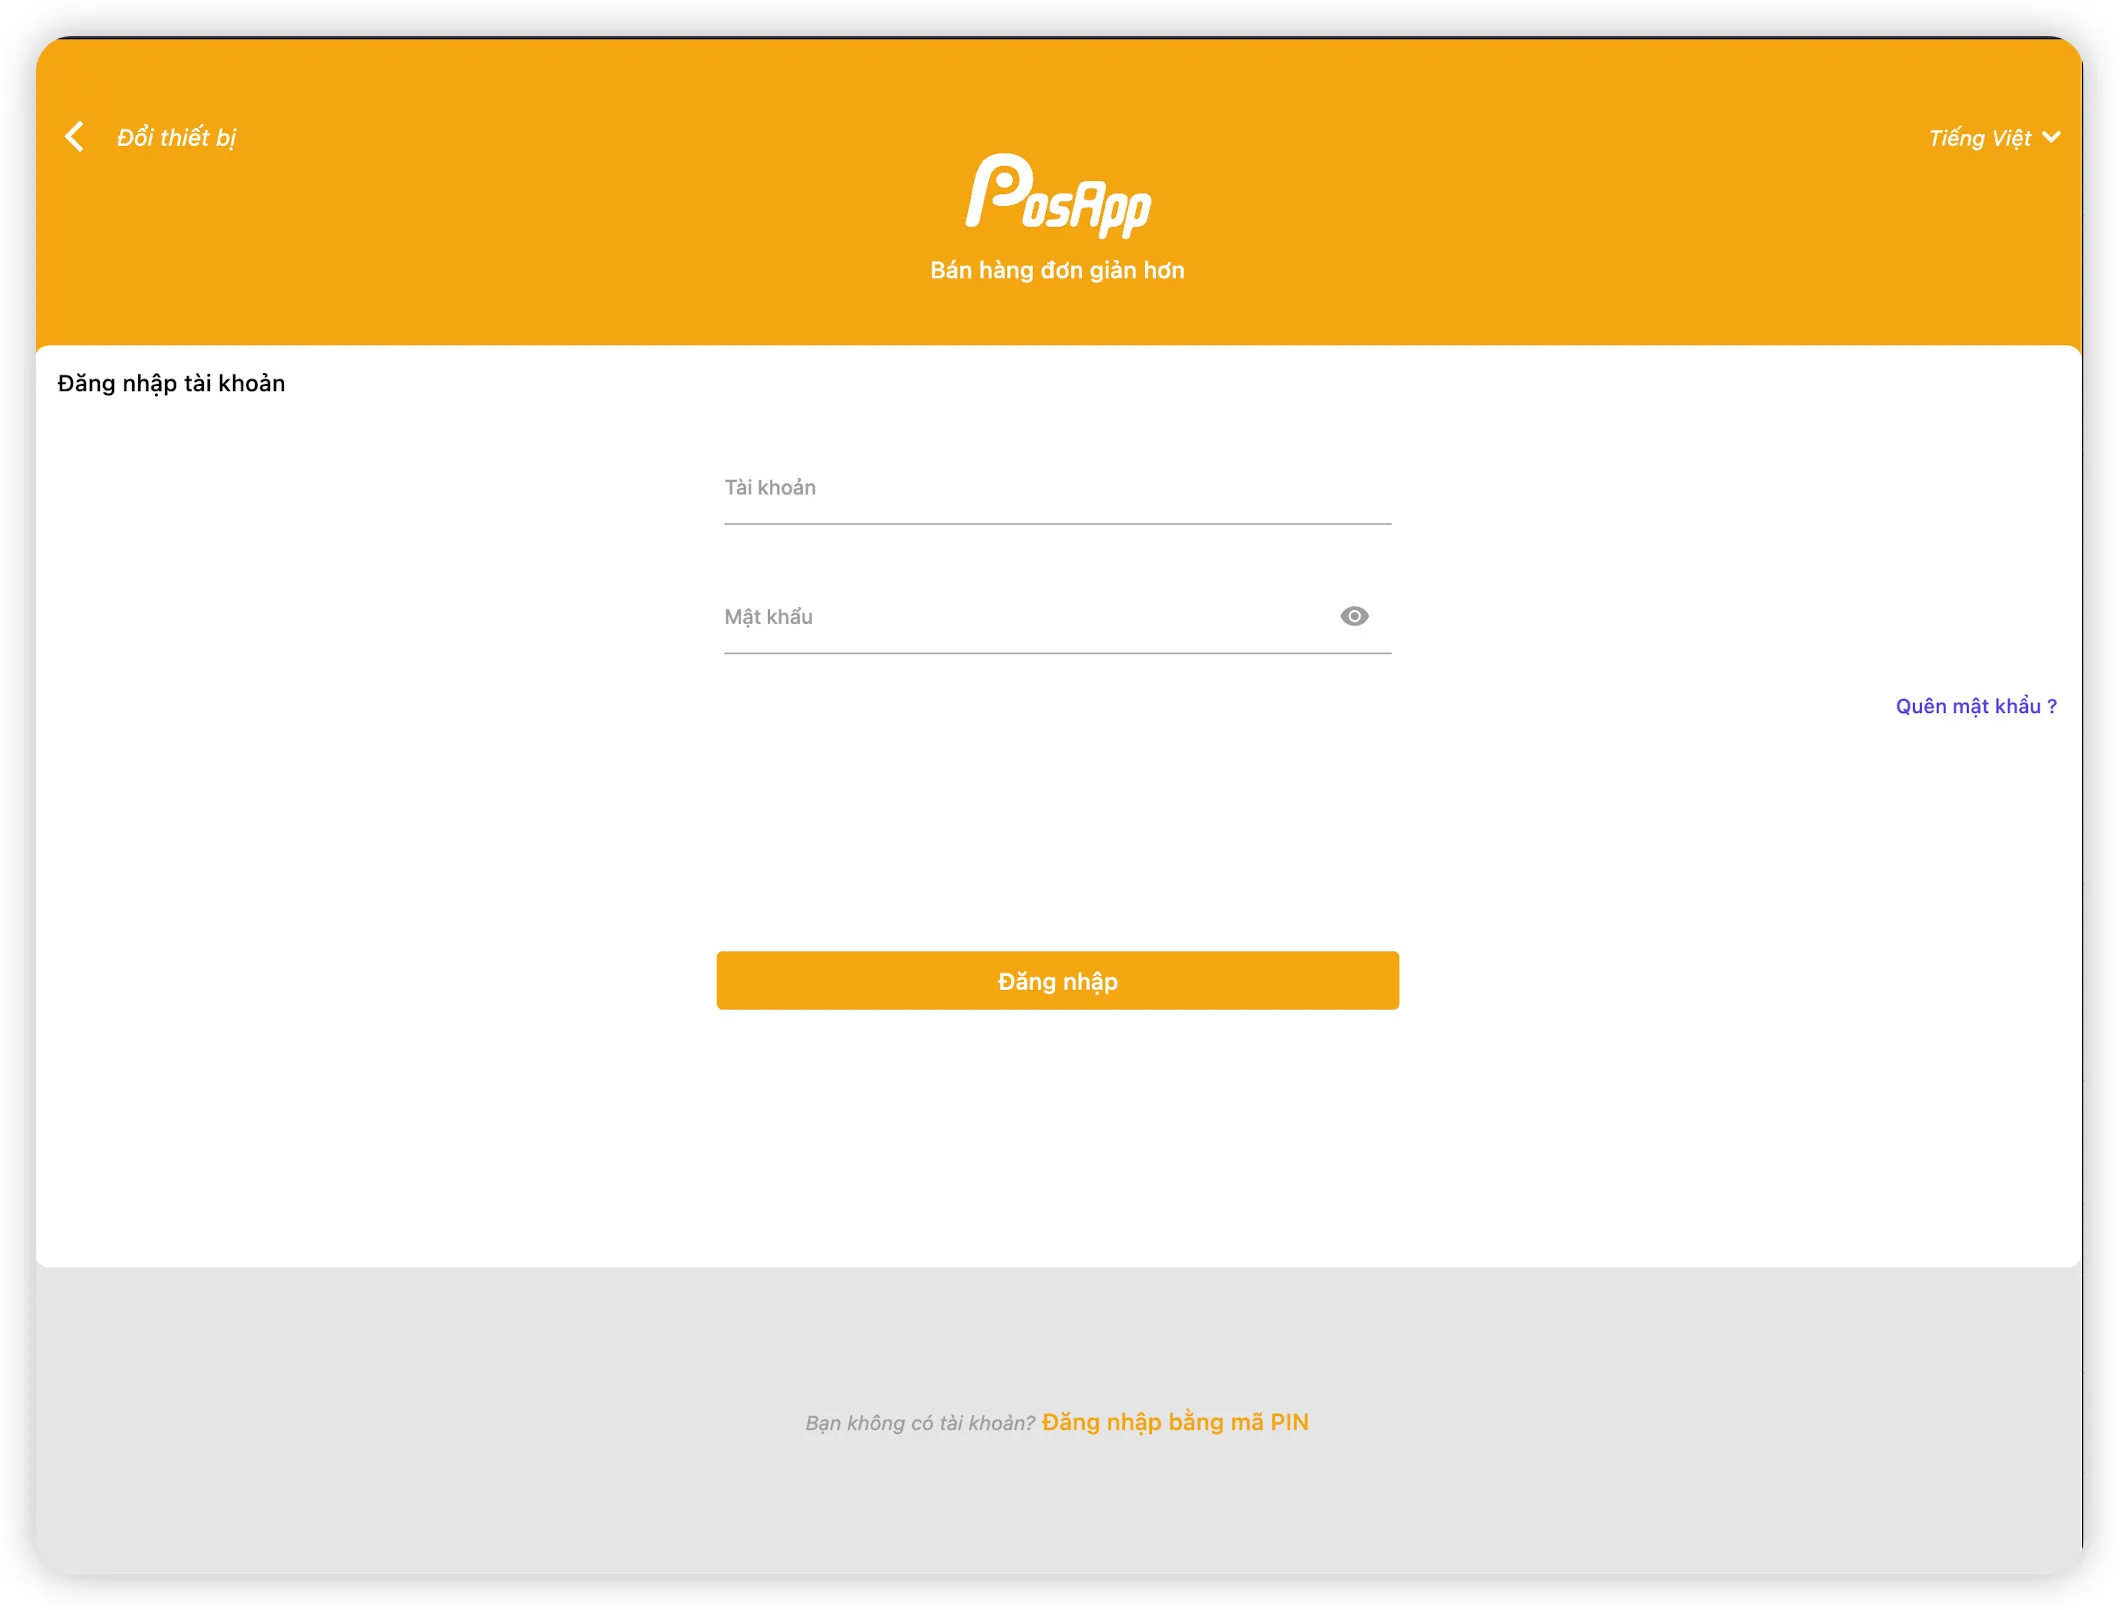
* Trên màn hình đăng nhập, điền mã thiết bị PDA ở bước 5
<figure><img src="https://files.gitbook.com/v0/b/gitbook-x-prod.appspot.com/o/spaces%2F-MXFSIGoxOOM1xROtoGl%2Fuploads%2F3o41rM8fXgoTjlrAde8F%2Fimage.png?alt=media&#x26;token=e073a914-0f54-4c29-8f50-18fbb4b07b44" alt=""><figcaption></figcaption></figure>

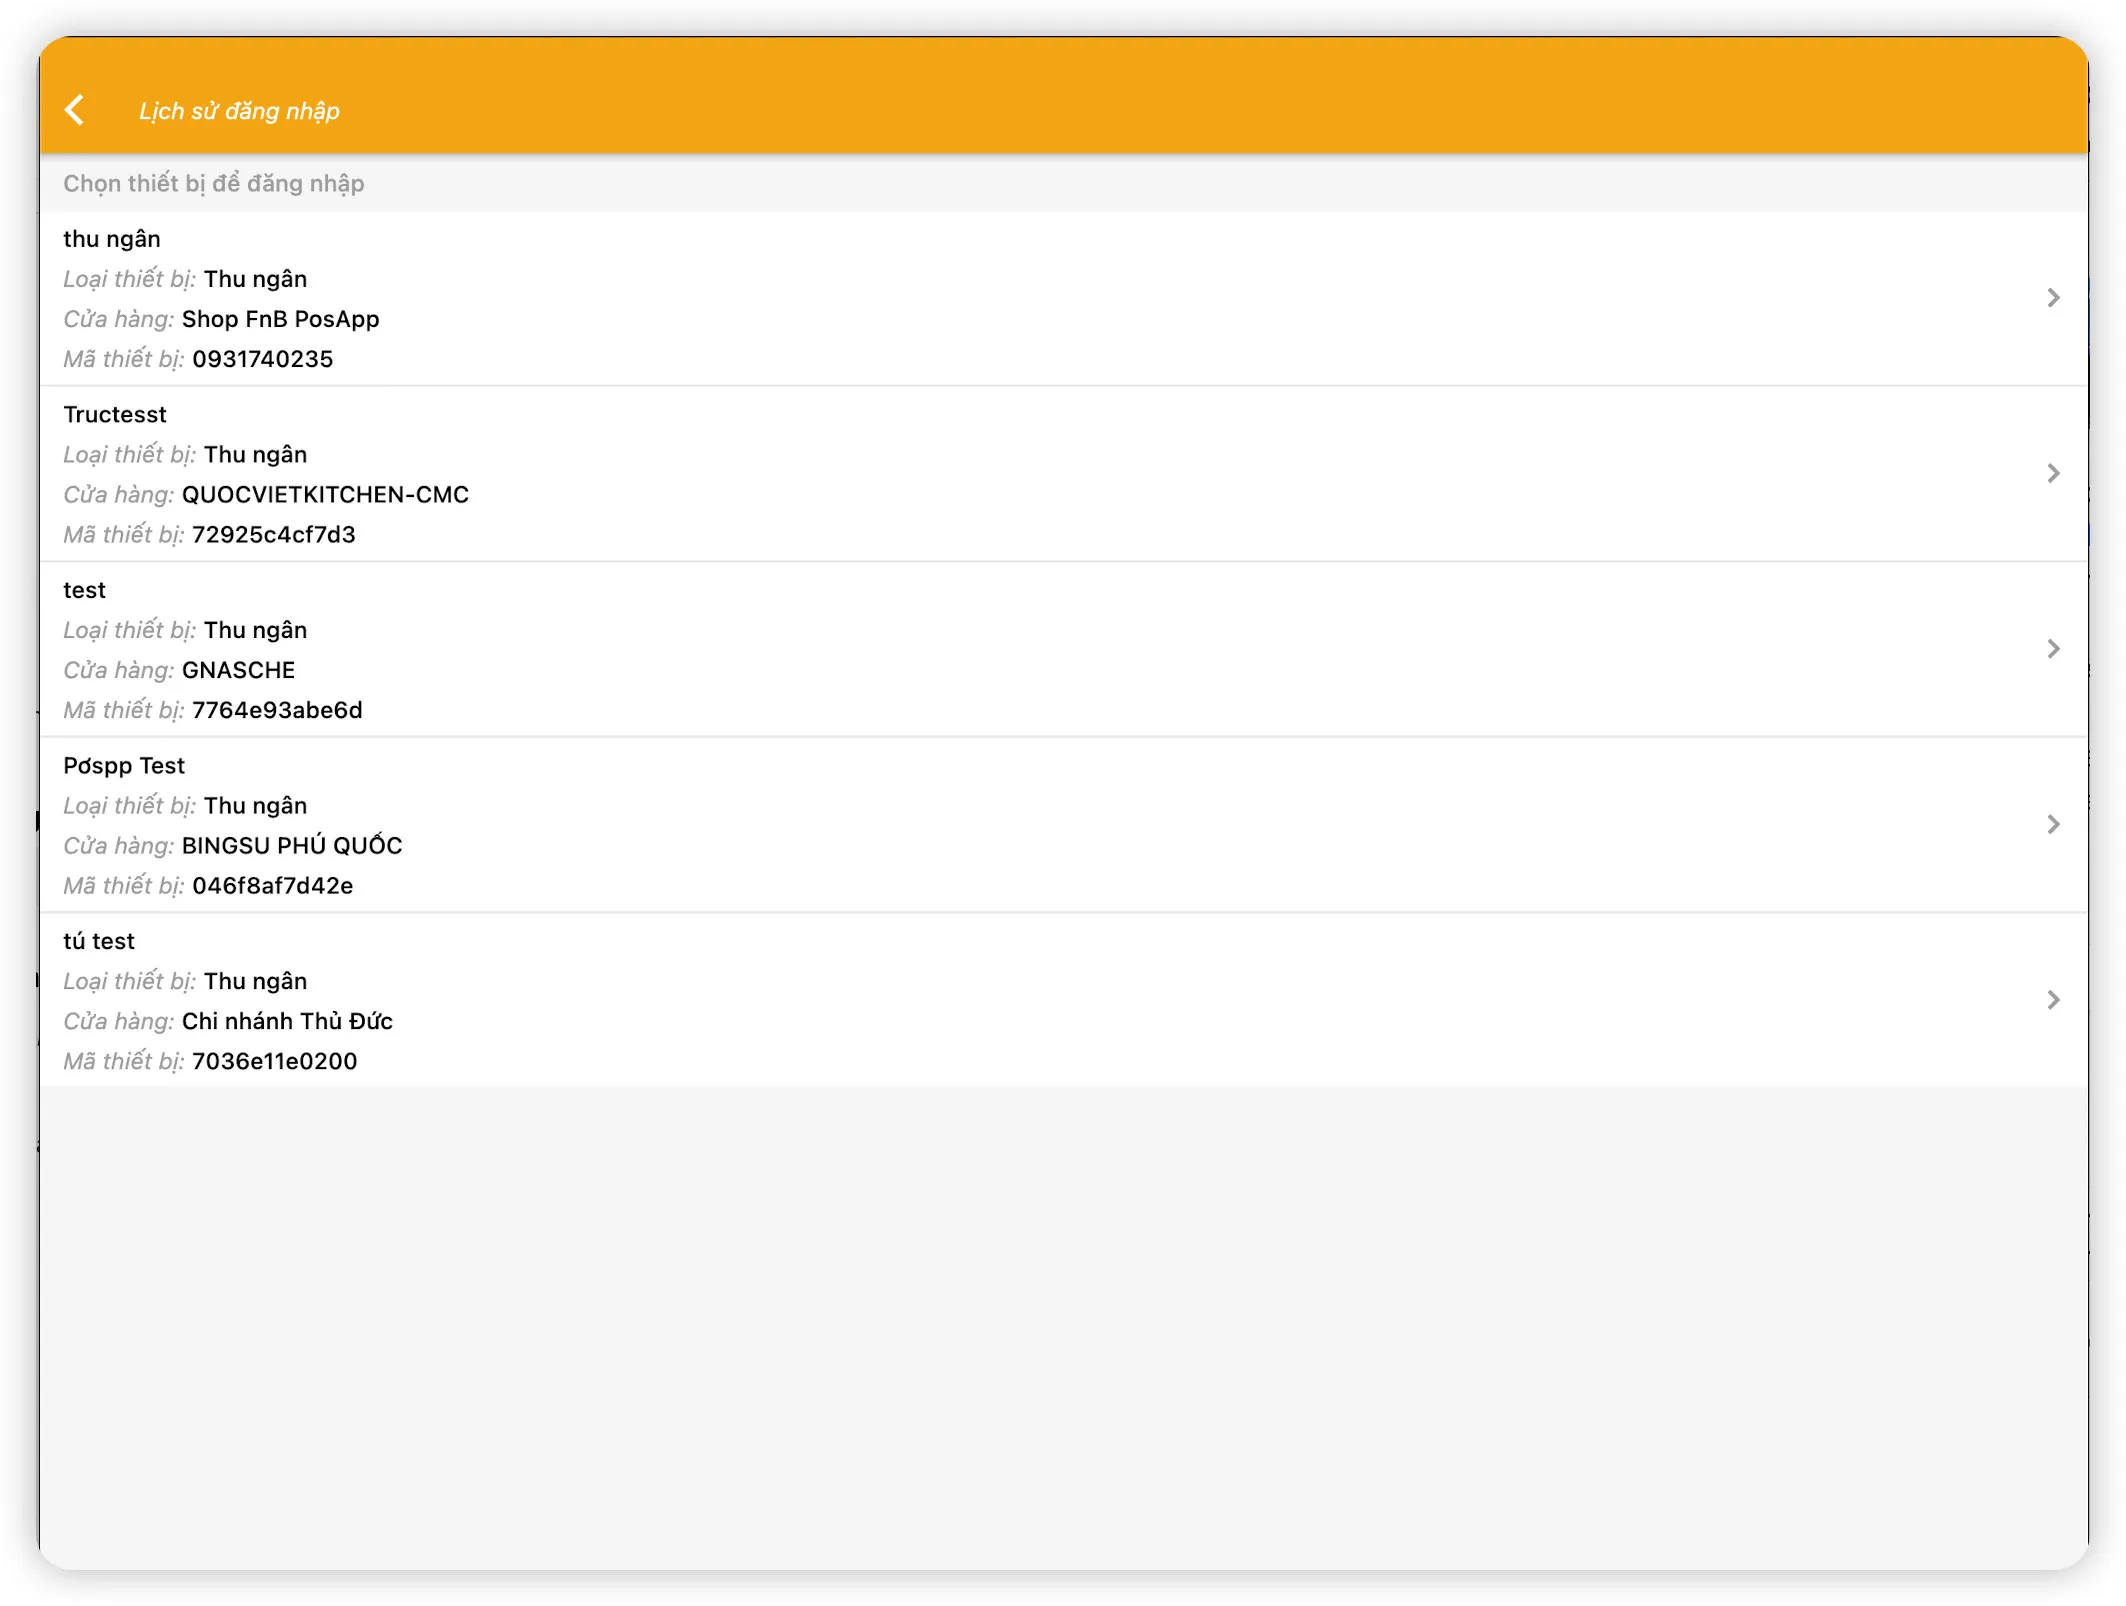
Ngoài ra bạn cũng có thể vào **lịch sử đăng nhập** để vào tài khoản thiết bị nhanh chóng

<figure><img src="https://files.gitbook.com/v0/b/gitbook-x-prod.appspot.com/o/spaces%2F-MXFSIGoxOOM1xROtoGl%2Fuploads%2Fztbb9lPTlm9IXlQdNntR%2Fimage.png?alt=media&#x26;token=f81d2fed-3dcc-4c6a-884c-f419e2a080ea" alt=""><figcaption></figcaption></figure>

Nhập mã PIN đăng nhập tài khoản nhân viên hoặc User / Pass tài khoản của nhân viên
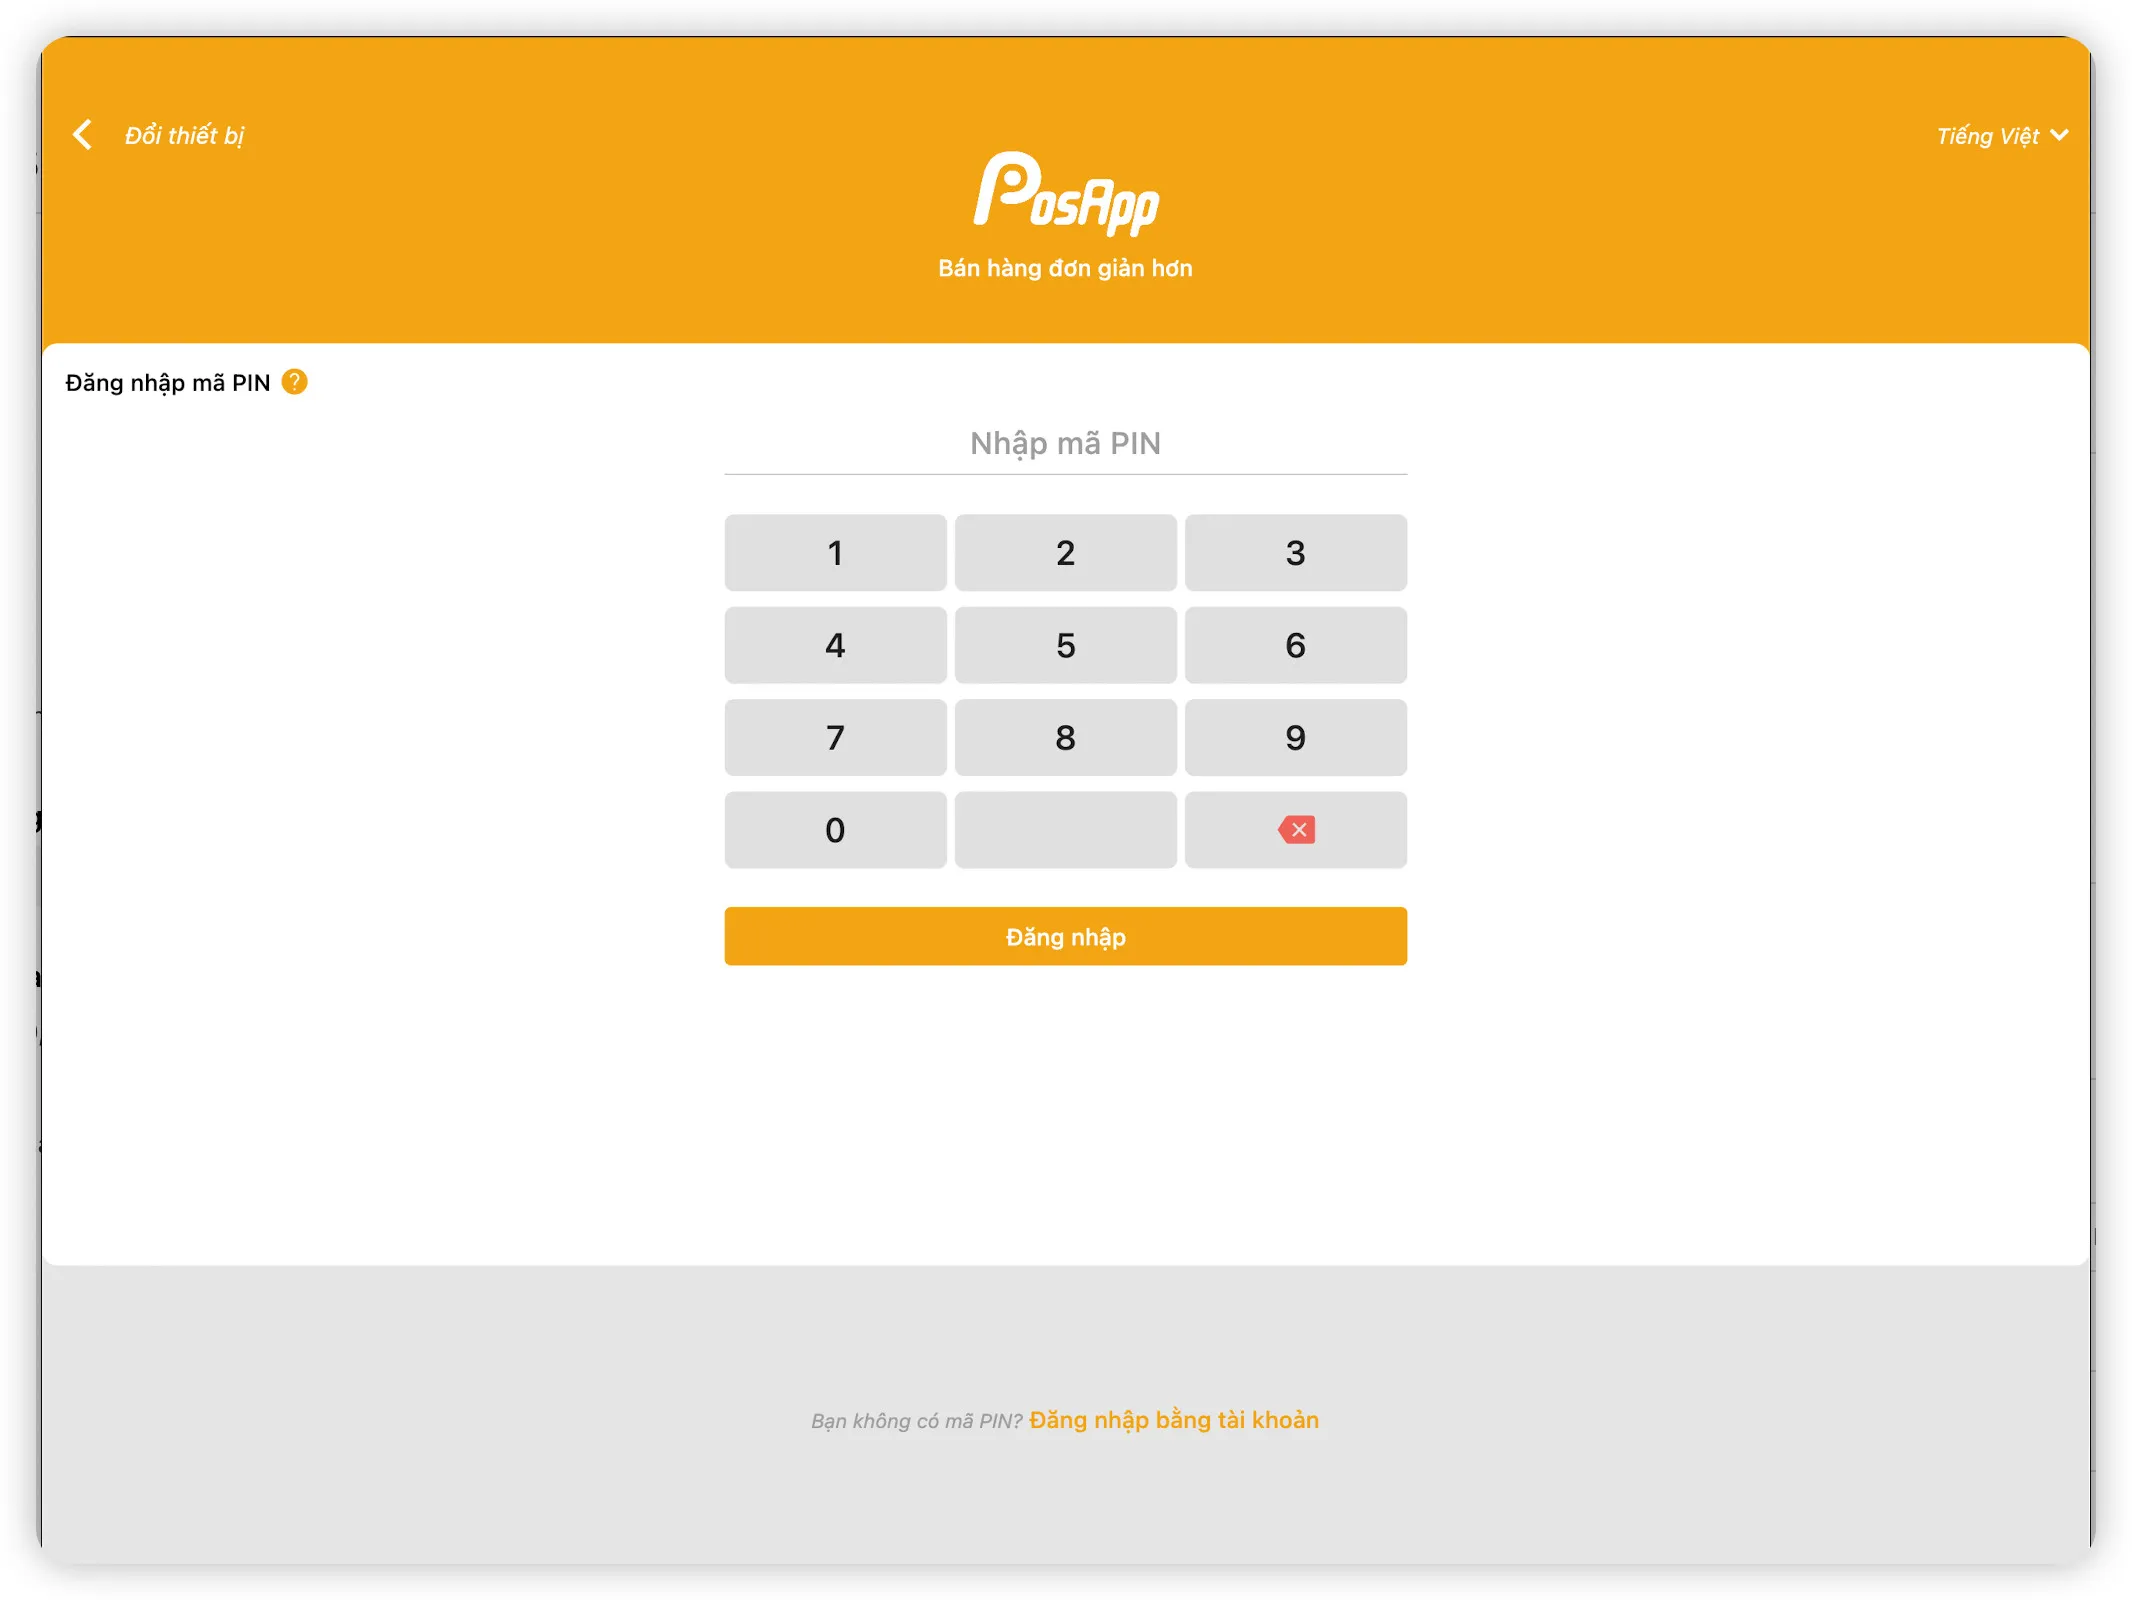
<figure><img src="https://files.gitbook.com/v0/b/gitbook-x-prod.appspot.com/o/spaces%2F-MXFSIGoxOOM1xROtoGl%2Fuploads%2FLiZpOSItshQsJSUhmJ4V%2Fimage.png?alt=media&#x26;token=5aaab6c0-0680-4985-a633-9ecd4ded2bef" alt=""><figcaption><p>Đăng nhập bằng mã Pin</p></figcaption></figure>

<figure><img src="https://files.gitbook.com/v0/b/gitbook-x-prod.appspot.com/o/spaces%2F-MXFSIGoxOOM1xROtoGl%2Fuploads%2Fag7hU905kkirnZDxUrJN%2Fimage.png?alt=media&#x26;token=63dea22b-2807-4555-b06f-99e2e5151062" alt=""><figcaption><p>Đăng nhập bằng tài khoản (User/Pass)</p></figcaption></figure>

**=> CHÚC BẠN THÀNH CÔNG**

<br>


---

# Agent Instructions: Querying This Documentation

If you need additional information that is not directly available in this page, you can query the documentation dynamically by asking a question.

Perform an HTTP GET request on the current page URL with the `ask` query parameter:

```
GET https://docs.posapp.vn/quan-tri/huong-dan-cach-lay-ma-thiet-bi/quan-ly-thiet-bi-app.md?ask=<question>
```

The question should be specific, self-contained, and written in natural language.
The response will contain a direct answer to the question and relevant excerpts and sources from the documentation.

Use this mechanism when the answer is not explicitly present in the current page, you need clarification or additional context, or you want to retrieve related documentation sections.